AWSのIoT Coreに接続するためには、証明書が必須と思っていましたが、カスタム認証を使うと、ユーザー名とパスワードで認証ができます。
証明書を使った認証は、IoT Coreが自動でやってくれますが、ユーザー名とパスワードによる認証の場合は、認証用のLambdaを作成して認証を行います。
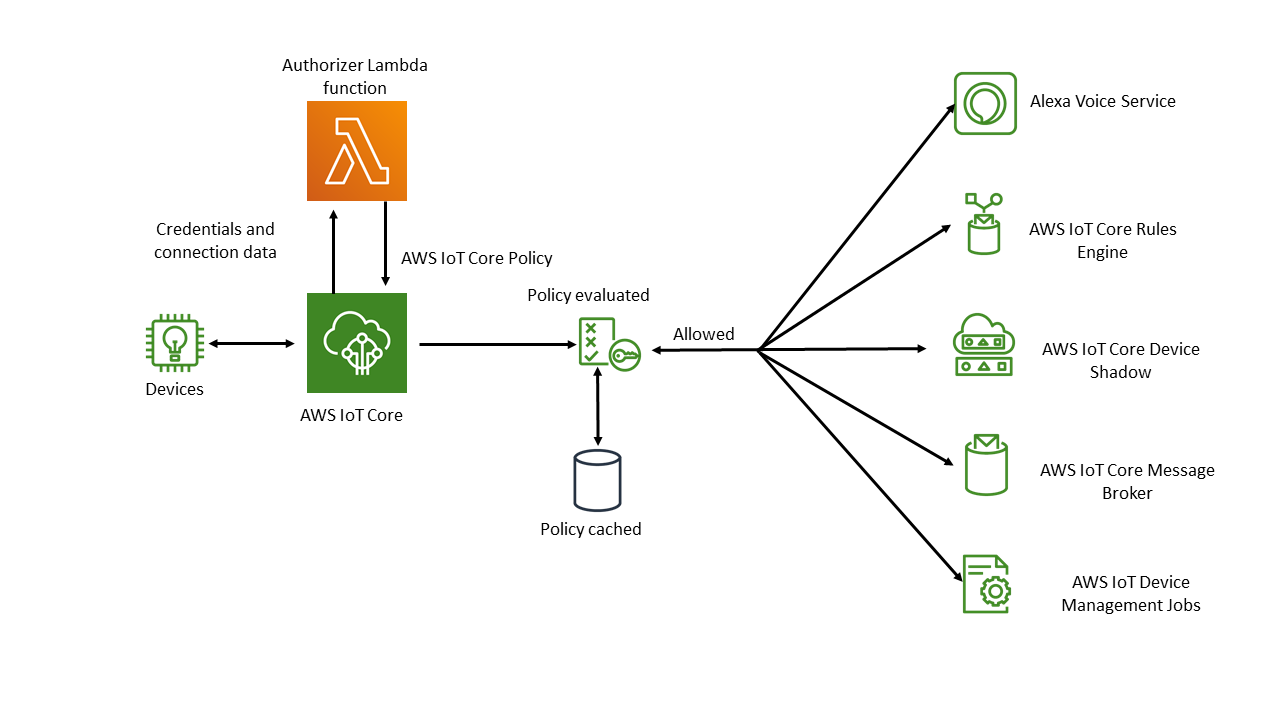 ※図は公式ドキュメントからの引用です。
MQTT接続で行う場合には以下の制約があります。
- 接続ポートはMQTTSの8883ではなく443である必要がある
- ALPN拡張に
MQTTの値を指定する必要がある
https://docs.aws.amazon.com/ja_jp/iot/latest/developerguide/custom-auth.html
オーソライザーを呼び出すには、MQTT とカスタム認証を使用して AWS IoT Core に接続するデバイスがポート 443 に接続する必要があります。また、mqtt の値を持つ Application Layer Protocol Negotiation (ALPN) TLS 拡張と、AWS IoT Core データエンドポイントのホスト名を持つ Server Name Indication (SNI) 拡張を渡す必要があります。
手順
カスタム認証用のLambdaの作成
https://docs.aws.amazon.com/ja_jp/iot/latest/developerguide/config-custom-auth.html
公式ドキュメントのサンプルをそのまま使ってみます。
この例では、パスワードがtestだったら認証OKとなっています。
LambdaにはBase64エンコードされたパスワードが渡されるのでエンコードして使用します。
// A simple Lambda function for an authorizer. It demonstrates
// how to parse an MQTT password and generate a response.

exports.handler = function(event, context, callback) {
    var uname = event.protocolData.mqtt.username;
    var pwd = event.protocolData.mqtt.password;
    var buff = new Buffer(pwd, 'base64');
    var passwd = buff.toString('ascii');
    switch (passwd) {
        case 'test':
            callback(null, generateAuthResponse(passwd, 'Allow'));
        default:
            callback(null, generateAuthResponse(passwd, 'Deny'));
    }
};

// Helper function to generate the authorization response.
var generateAuthResponse = function(token, effect) {
    var authResponse = {};
    authResponse.isAuthenticated = true;
    authResponse.principalId = 'TEST123';

    var policyDocument = {};
    policyDocument.Version = '2012-10-17';
    policyDocument.Statement = [];
    var publishStatement = {};
    var connectStatement = {};
    connectStatement.Action = ["iot:Connect"];
    connectStatement.Effect = effect;
    connectStatement.Resource = ["arn:aws:iot:us-east-1:123456789012:client/myClientName"];
    publishStatement.Action = ["iot:Publish"];
    publishStatement.Effect = effect;
    publishStatement.Resource = ["arn:aws:iot:us-east-1:123456789012:topic/telemetry/myClientName"];
    policyDocument.Statement[0] = connectStatement;
    policyDocument.Statement[1] = publishStatement;
    authResponse.policyDocuments = [policyDocument];
    authResponse.disconnectAfterInSeconds = 3600;
    authResponse.refreshAfterInSeconds = 300;

    return authResponse;
}
認証がOKだった場合に、IoTポリシーを返却します。この例ではこのようなポリシーが返却されます。
クライアントIDがmyClientNameでのiot:Connectと、telemetry/myClientNameトピックへのiot:Publishが許可されます。
{
    "Version": "2012-10-17",
    "Statement": [
        {
            "Action": [
                "iot:Connect"
            ],
            "Effect": "Allow",
            "Resource": [
                "arn:aws:iot:us-east-1:123456789012:client/myClientName"
            ]
        },
        {
            "Action": [
                "iot:Publish"
            ],
            "Effect": "Allow",
            "Resource": [
                "arn:aws:iot:us-east-1:123456789012:topic/telemetry/myClientName"
            ]
        }
    ]
}
カスタムオーソライザーの登録
IoT Coreのマネジメントコンソールを開き、左メニューのオーソライザーを選択します。
作成ボタンをクリックします。
名前をつけて、先程作成したLambdaを選択します。
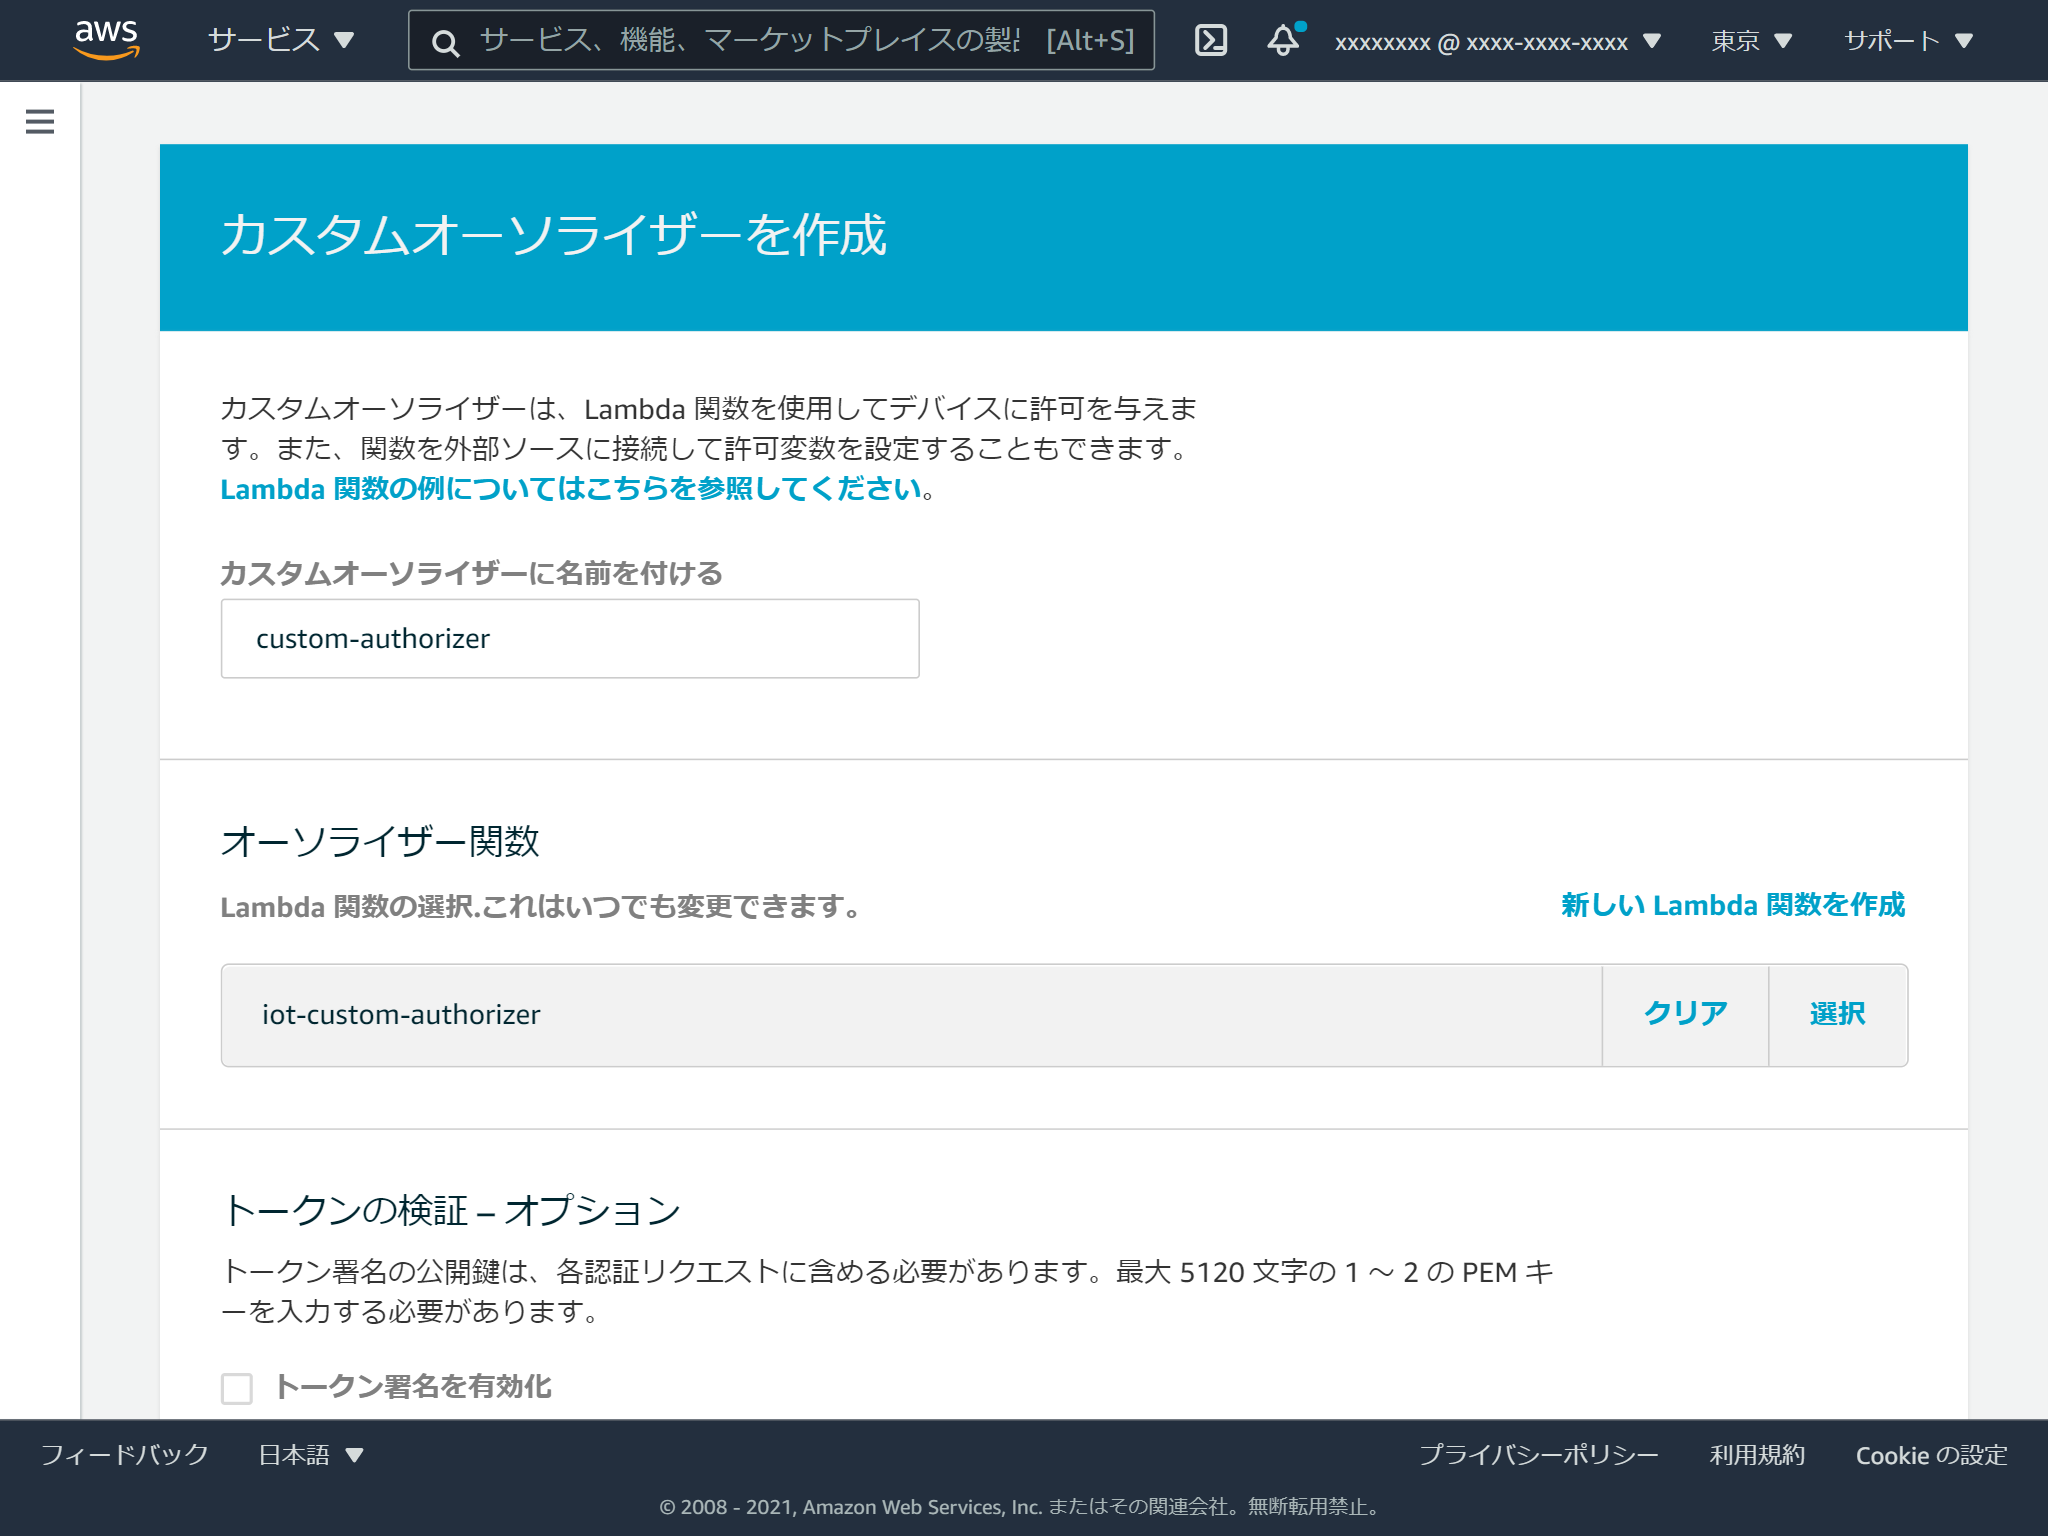
トークンの検証は今回は有効にはせず、オーソライザーのアクティブ化にチェックを入れ、オーソライザーの作成ボタンをクリックします。

デフォルトのオーソライザーを登録
作成したオーソライザーが呼び出されるようにするには、デフォルトのオーソライザーの登録が必要です。 マネジメントコンソールからはできないようですので、CLIで行います。
aws iot set-default-authorizer --authorizer-name custom-authorizerこれでAWS IoT Coreの設定は完了です。
接続するクライアントの作成
PahoクライアントのPython版を使います。 こちらのブログ記事を参考にしました。
pip install paho-mqttブログのものから、以下の項目を変更します。
IoT_protocol_nameをmqttに変更- 証明書認証に関する部分をコメントアウト
- Publishするトピック名を
telemetry/myClientNameに変更 - クライアントIDに
myClientNameを指定 username_pw_setでユーザー名とパスワードを指定
もちろんエンドポイントの変更も必要です。
from __future__ import print_function
import sys
import ssl
import time
import datetime
import logging, traceback
import paho.mqtt.client as mqtt

IoT_protocol_name = "mqtt" ### 変更
aws_iot_endpoint = "AWS_IoT_ENDPOINT_HERE" # <random>.iot.<region>.amazonaws.com
url = "https://{}".format(aws_iot_endpoint)

# ca = "YOUR/ROOT/CA/PATH" ### 変更
# cert = "YOUR/DEVICE/CERT/PATH" ### 変更
# private = "YOUR/DEVICE/KEY/PATH" ### 変更

logger = logging.getLogger()
logger.setLevel(logging.DEBUG)
handler = logging.StreamHandler(sys.stdout)
log_format = logging.Formatter('%(asctime)s - %(name)s - %(levelname)s - %(message)s')
handler.setFormatter(log_format)
logger.addHandler(handler)

def ssl_alpn():
    try:
        #debug print opnessl version
        logger.info("open ssl version:{}".format(ssl.OPENSSL_VERSION))
        ssl_context = ssl.create_default_context()
        ssl_context.set_alpn_protocols([IoT_protocol_name])
        # ssl_context.load_verify_locations(cafile=ca) ### 変更
        # ssl_context.load_cert_chain(certfile=cert, keyfile=private) ### 変更

        return  ssl_context
    except Exception as e:
        print("exception ssl_alpn()")
        raise e

if __name__ == '__main__':
    topic = "telemetry/myClientName" ### 変更
    try:
        mqttc = mqtt.Client(client_id='myClientName') ### 変更
        ssl_context= ssl_alpn()
        mqttc.tls_set_context(context=ssl_context)
        mqttc.username_pw_set('username', 'test') ### 変更
        logger.info("start connect")
        mqttc.connect(aws_iot_endpoint, port=443)
        logger.info("connect success")
        mqttc.loop_start()

        while True:
            now = datetime.datetime.now().strftime('%Y-%m-%dT%H:%M:%S')
            logger.info("try to publish:{}".format(now))
            mqttc.publish(topic, now)
            time.sleep(1)

    except Exception as e:
        logger.error("exception main()")
        logger.error("e obj:{}".format(vars(e)))
        logger.error("message:{}".format(e.message))
        traceback.print_exc(file=sys.stdout)
## 接続テスト
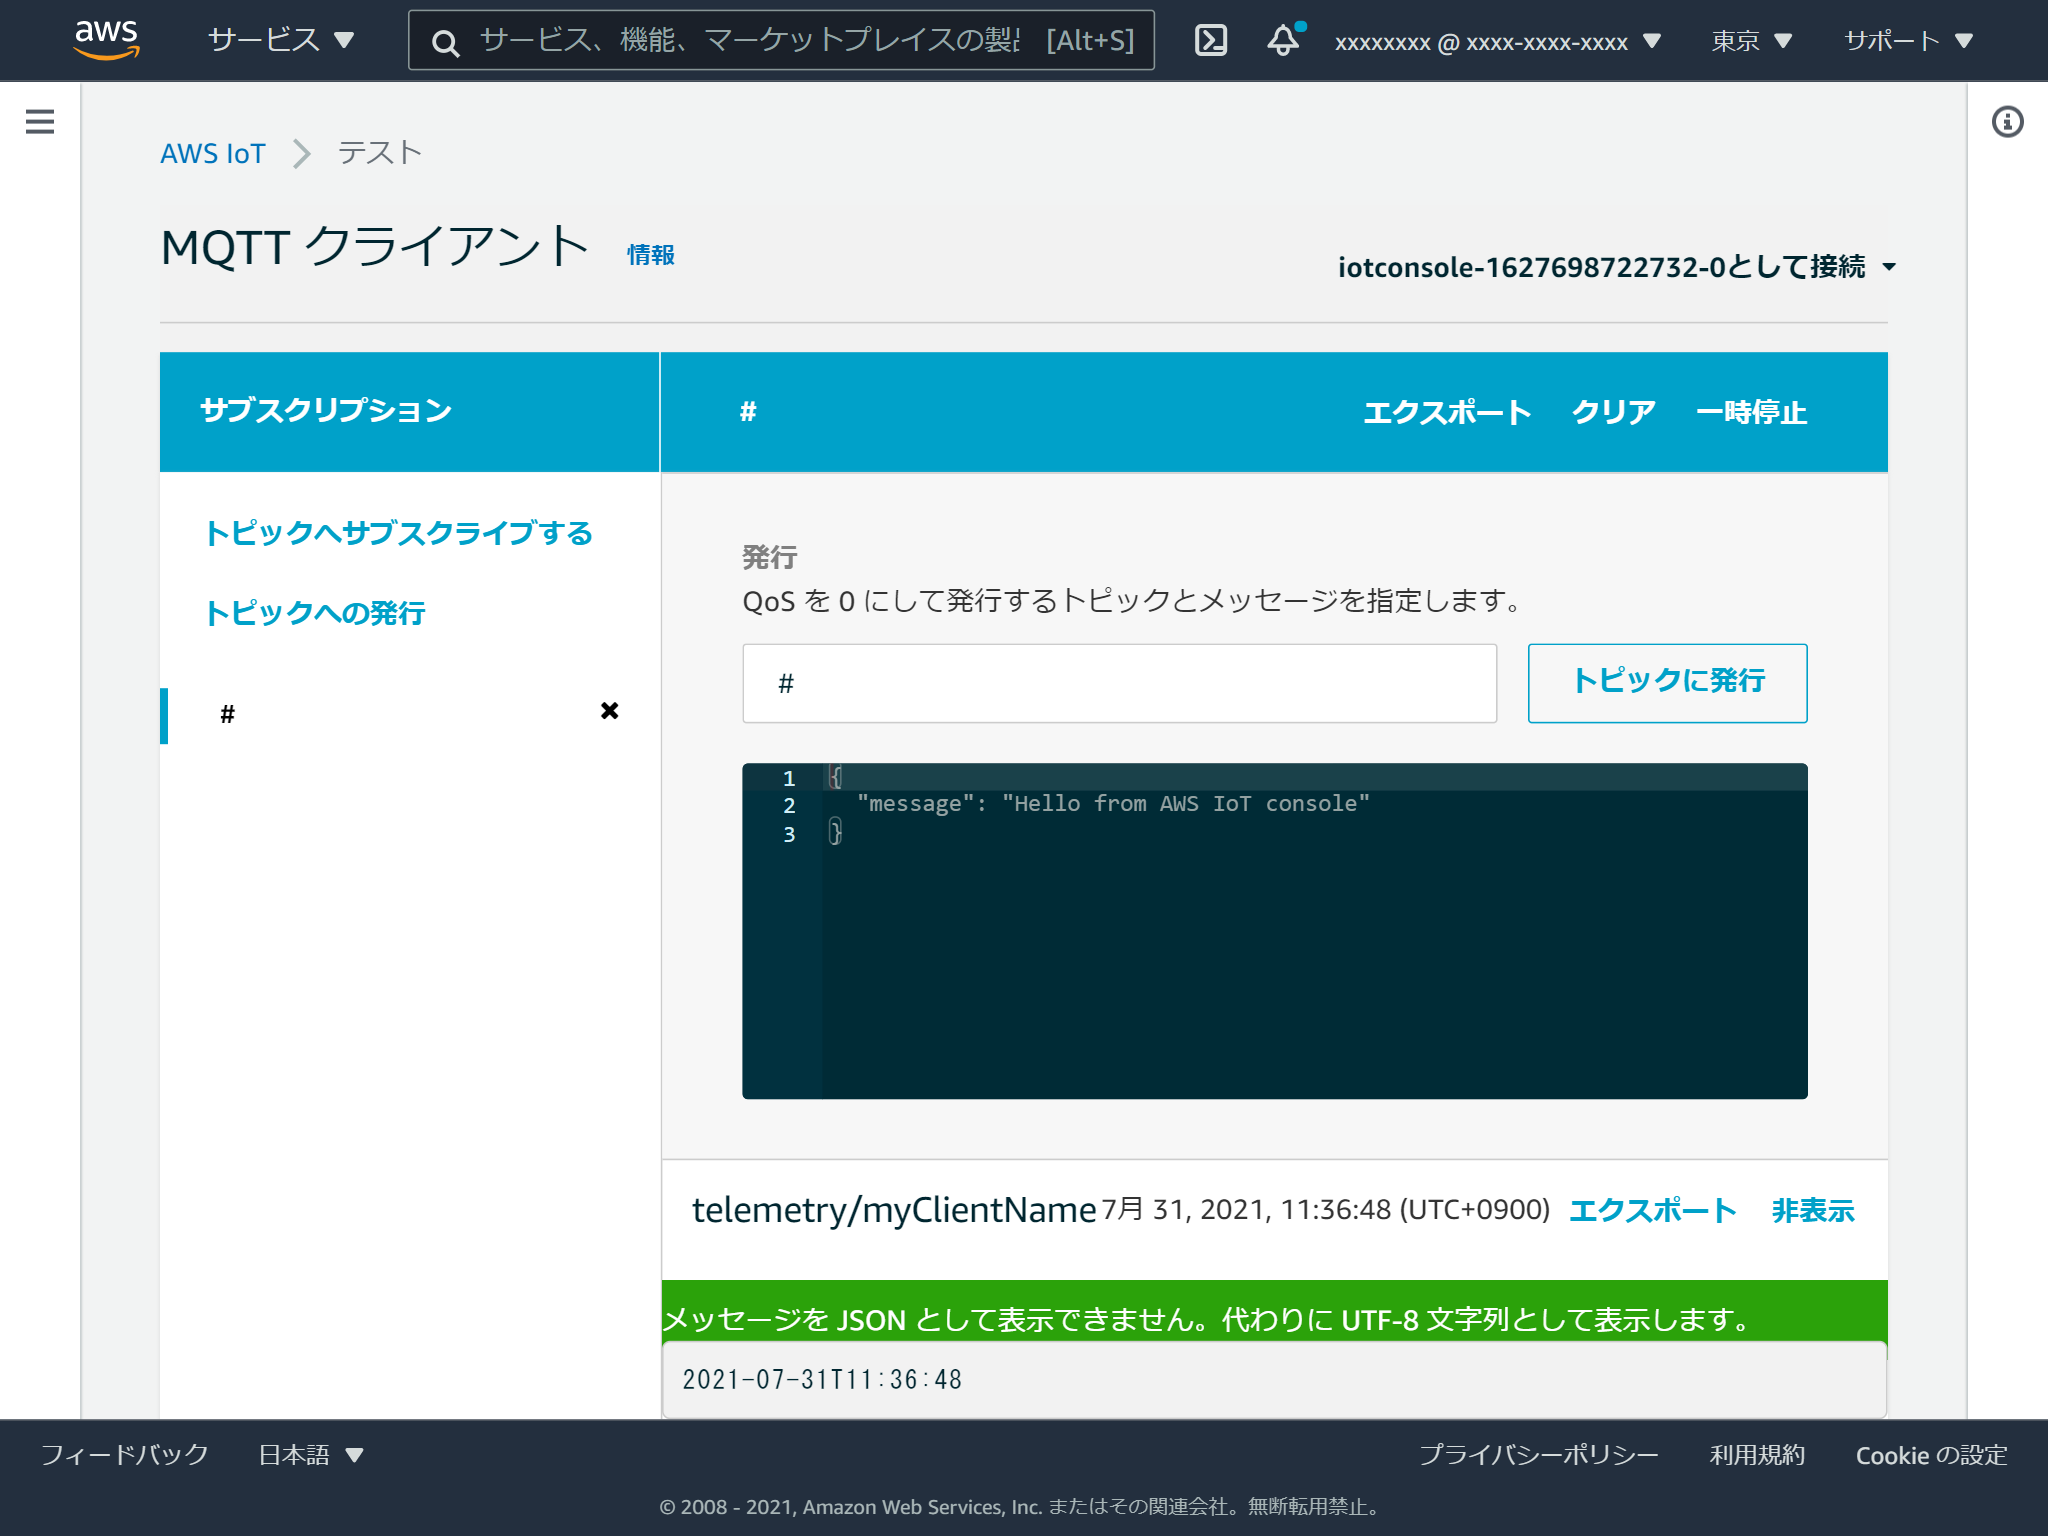
無事にPublishできました。
パスワードが間違っていたり、クライアントIDやトピック名が許可されたもの以外の場合にPublishしたメッセージが届かないことも確認しました。